The financial world is constantly evolving, and with the advent of innovative technologies, our options for managing money are expanding. One such innovation is the emergence of Apple Pay ATMs, which blend the convenience of digital payments with the need for physical cash access. In this comprehensive user’s guide, we will explore the world of Apple Pay ATMs, how to use them effectively, and the benefits they offer.
Understanding Apple Pay ATMs
What Are Apple Pay ATMs?
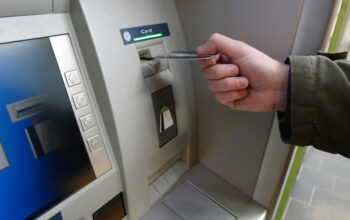
Apple Pay ATMs are traditional Automated Teller Machines (ATMs) that have been upgraded to accept Apple Pay as a withdrawal method. This means that you can now use your Apple Pay-enabled devices, such as iPhones or Apple Watches, to access your bank accounts and withdraw cash from these ATMs.
The Evolution of Cash Access
The rise of mobile payment systems like Apple Pay has changed the way we transact. However, there are still situations where physical cash is necessary, making it crucial to bridge the gap between the digital and cash worlds. Apple Pay ATMs offer a seamless solution to this dilemma.
Getting Started with Apple Pay ATMs
To navigate the world of Apple Pay ATMs, you need to ensure that you have the necessary setup and know how to use them effectively. Here’s a step-by-step guide to help you get started:
1. Set Up Apple Pay
If you haven’t already set up Apple Pay on your device, follow these steps:
- Open the Wallet App: Find the Wallet app on your iPhone or the Apple Watch app on your Apple Watch.
- Add Credit or Debit Card: Tap on “Add Credit or Debit Card.”
- Enter Card Details: You can either manually enter your card details or use your device’s camera to scan your card. Follow the on-screen prompts to complete the process.
- Verify Your Card: In some cases, your bank may require you to verify your card. This typically involves receiving a verification code through text message or email and entering it into the app.
2. Link Your Bank Account
Once you have set up Apple Pay, you can link your bank account to it for easy access:
- Open Device Settings: Go to the “Settings” app on your device.
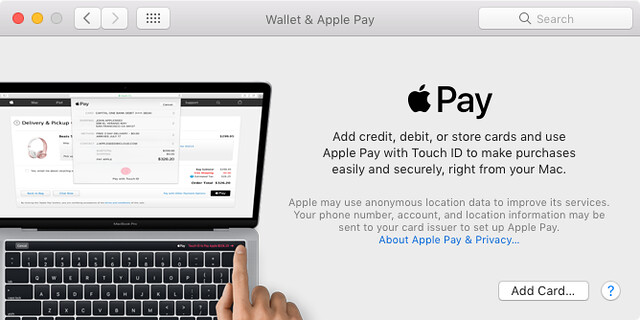
- Access Wallet & Apple Pay: Scroll down and tap on “Wallet & Apple Pay.”
- Add Credit or Debit Card: Under “Transaction Defaults,” tap on “Add Credit or Debit Card.”
- Add Your Bank Account: Follow the on-screen instructions to add your bank account to Apple Pay. You may need to provide additional verification details, such as your card’s expiration date and CVV.
- Verify Your Bank Account: Some banks may require additional verification for added security.
3. Locate an Apple Pay ATM
To find an Apple Pay ATM near you, consider the following options:
- Contact Your Bank: Get in touch with your bank to inquire about the nearest Apple Pay-enabled ATMs in your area.
- Use ATM Locator Apps: Many major banks and financial institutions offer ATM locator apps that can help you find Apple Pay ATMs. Download these apps and search for nearby locations.
- Google Maps: You can also use Google Maps and search for “Apple Pay ATM near me” to find the closest Apple Pay ATM locations.
4. Make a Cash Withdrawal
Once you’ve located an Apple Pay ATM and you’re ready to make a cash withdrawal, follow these steps:
- Approach the ATM: Ensure that the ATM supports Apple Pay withdrawals by looking for the Apple Pay logo or any indication that Apple Pay is accepted.
- Open Wallet App: Open the “Wallet” app on your Apple device.
- Select Your Card: Choose the card linked to your bank account or debit card for the withdrawal.
- Authenticate Your Transaction: Hold your device close to the contactless payment symbol on the ATM. Follow the on-screen instructions to authenticate the transaction, which may involve using Face ID, Touch ID, or entering your device passcode.
- Specify Withdrawal Amount: Enter the amount of cash you wish to withdraw and confirm the transaction.
- Collect Your Cash: Wait for the Apple Pay ATM to dispense your cash, and be sure to collect it promptly.
5. Keep Digital Records
After completing your withdrawal, you’ll receive a digital receipt on your device. These receipts are essential for tracking expenses and maintaining financial records. Make sure to keep them for your records.
Advantages of Apple Pay ATMs
Using Apple Pay ATMs comes with several advantages that enhance your cash withdrawal experience:
1. Enhanced Security
Transactions made through Apple Pay services ATMs are highly secure. The biometric authentication methods (fingerprint or facial recognition) used for authentication add an extra layer of security, making it challenging for unauthorized individuals to access your funds.
2. Convenience
Apple Pay ATMs offer unparalleled convenience. You can initiate cash withdrawals directly from your smartphone or smartwatch, eliminating the need to carry physical cards. This convenience extends to situations where you might have forgotten your wallet but still have your mobile device with you.
3. Accessibility
The integration of Apple Pay into ATMs ensures that individuals who rely on mobile payments have easy access to cash when they need it. This accessibility is particularly valuable in locations where cash remains the primary mode of payment.
4. Digital Records
Apple Pay ATMs provide you with digital receipts for your transactions. These digital records simplify expense tracking and financial record-keeping, helping you maintain better control over your finances.
Challenges and Tips
While Apple Pay ATMs offer numerous benefits, it’s essential to be aware of potential challenges and how to address them:
1. Limited Availability
Not all ATMs support Apple Pay, so it’s essential to check for locations that support this feature before heading out to withdraw cash. Be prepared to use traditional ATMs when necessary.
2. Transaction Limits
Some Apple Pay ATMs may impose transaction limits for withdrawals. Be sure to check with your bank or the ATM operator for any restrictions on the amount you can withdraw in a single transaction.
3. Compatibility
Ensure that your Apple Pay-enabled device is compatible with the ATM. While most modern iPhones and Apple Watches support Apple Pay, verify compatibility with specific ATM models.
4. Network Connection
To use Apple Pay ATMs, you’ll need an active network connection, either through cellular data or Wi-Fi. Ensure that your device has an active connection before attempting a withdrawal.
In Conclusion
Apple Pay ATMs represent a significant leap in the evolution of cash access in an increasingly digital world. By integrating mobile payment functionality into traditional ATMs, these machines offer enhanced security, convenience, and accessibility to users. As this technology continues to evolve and gain widespread acceptance, it could redefine the way we access cash, making it more convenient and secure for everyone. While challenges and concerns must be addressed, Apple Pay ATMs signal a future where cash remains accessible to all, regardless of their preferred payment method. So, navigate this new world of Apple Pay ATMs with confidence, and experience a seamless blend of digital and physical cash access.